Sparkle Tutorial Using Visman Sparkle Filter
Here is what we will be making.
|
I have written this tutorial in this manner so you can work beside PSP without having to make a paper copy of this tut. I learned this technique from Hooty's Tuts. You can find his site HERE. An explanation of how to use this tut the Hooty Split Screen way can be found HERE. His classes are well worth taking and well worth the money spent. I am not even close to being as good as Hooty at writing tutorials. Wheeeeeeeeeeeew!!!!! LOL
Supplies needed: -A version of PSP. I used 9 but 8 and 10 will work. -Visman Sparkle Filter. Download HERE. For more Visman Filters Go HERE.
-A graphic of your choice.
This is a beginner tutorial mainly for someone who has not used a plugin before.
1. Unzip your VM Sparkle Filter into your plugin folder in PSP. If you have PSP open, you will have to close it and reopen it. If your sparkle filter does not show up, then you need to follow the directions below.
2. You need these files in order for Photoshop Plugins to work in PSP. To be able to use plugins created for Adobe Photoshop in Paint Shop Pro you must have these two dll files installed correctly. The msvcrt10.dll file should be unzipped into your C:\Windows\System folder and the plugin.dll file into your C:\Windows folder. Close PSP, if open, and reopen it.
3. Open your graphic in PSP. Hit Shift and D. This will duplicate your graphic. Close your original. This will keep you from saving over your original. Remember to save your work often.
4. If you have a background layer, you want to to right click and Promote Background Layer.
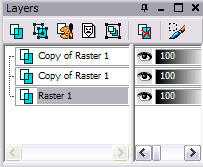
5. In your layer palette, duplicate your graphic two more times. You should have 3 layers now.
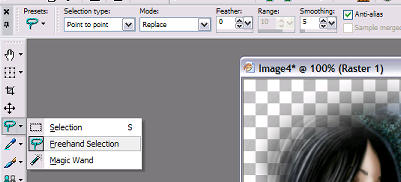
6. Highlight your first layer. You can hide the top two layers by clicking on the eye. Using your selection tool, select the first area you want to add sparkles.
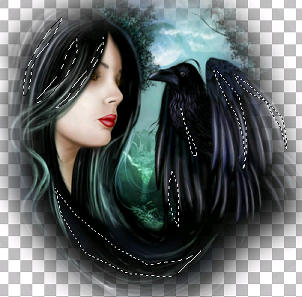
You will see "Marching Ants" where you selected. Holding your shift key down, select the next area you want to place sparkles. You can select as many areas as you want. Just make sure you are holding the shift key down while you select.
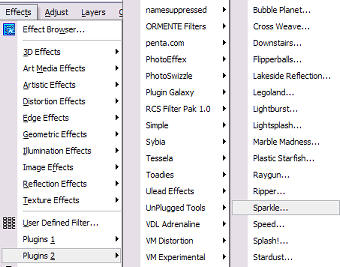
7. Here comes the fun part. Keeping your first layer selected, go to Effects>Plugins. Find your VM Natural>Sparkle Filter.
I know I have a lot of plugins. LOL
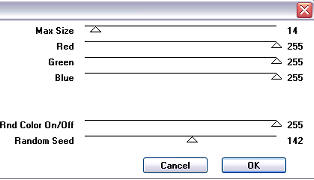
8. Use these settings for now. You can experiment later with settings to suit your graphic.
9. Highlight your second layer in your layer palette. Leave all the settings the same except change the Random Seed to 135.
10. Highlight your third layer in your layer palette. Leave all the settings the same except change the Random Seed to 140. Go to Selections and Select None.
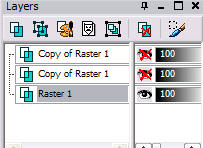
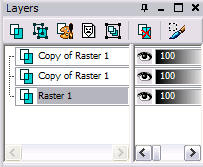
11. Make sure all your layers are unhidden by clicking on the eye. No red line should be seen.
Incorrect
Correct
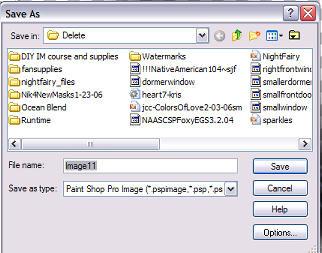
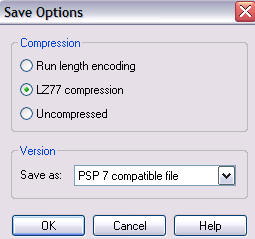
12. Save as a pspimage. A word about your setting here. When you save your image, you will have to make sure under options, your settings are correct. Go to Options.
Under Version tick PSP 7 compatible file.
For some reason Jasc did not configure this correctly for Animation Shop. If you don't do this, it will show as an invalid file when you try to animate it.
Remember where you saved it and I will meet you in Animation Shop.
This tutorial is written by Annie (Singanpray) for Kate. Happy PSPing, Kate! Any similarities to other tutorials is purely coincidental.
Credit for tube goes to:
|