|
Using A Mask In PSP
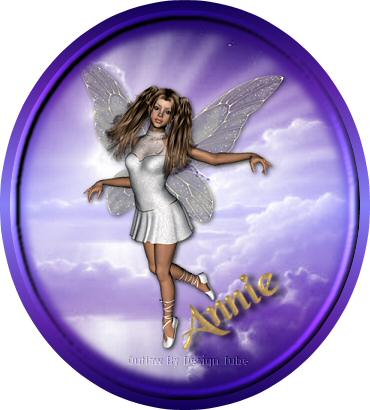
This is what we will be making.
This tutorial was written for PSP 8 but I am sure it will
work in other versions. I have written
this tutorial for Beginners and hope to explain this well with screen
shots. The example images have been downsized for download time.
For this tutorial you will need Paint Shop Pro. You
may download a trial version
HERE.
Supplies contain:
The mask I used
or you may choose one of your own.
A tube of your
choice or you may use the one I used. Outlaw By Design has
graciously allowed me to use her fairy tube for this tutorial.
Please do not redistribute it in groups, e-mail, or any other way.
You may visit her
site HERE.
The gradient I used or one of your
choice.
DOWNLOAD SUPPLIES
Remember to Save
your work often.
Place your mask
to your mask folder. I have no idea who made this mask but it is so
beautiful. I left the file name intact.
Place your gradient to your Gradient
Folder.
Let's get started.
1. Open a new
transparent image 500X500. This is a huge but you can resize
later.
2. Use your Flood
Fill Tool  and flood it with the
gradient. and flood it with the
gradient.
3. Go to
Layers>Load/Save Mask>Load Mask From Disk. Find Your ts_mask54
Use the following
setup:
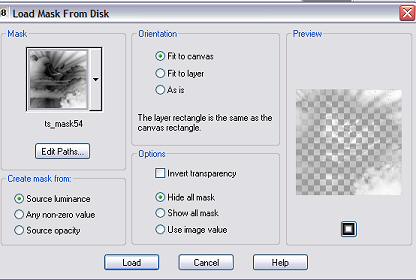
Click Load.
4. Now you are going
to merge your mask into the layer below it so go to your layer palette and
click on the icon below. Click yes when you see the window pop up.

5. Highlight the top layer in your layer
palette and right click. Merge and then Merge
Group. Your image should like:

6. Save your work as
a pspimage.
7. Open your image
and resize 70%. Go to Adjust>Sharpness>Sharpen.
8. Right click on the
gray bar at the top of your graphic. Select Copy. Go back to
your merged mask and right click on the gray bar and select Paste As A New
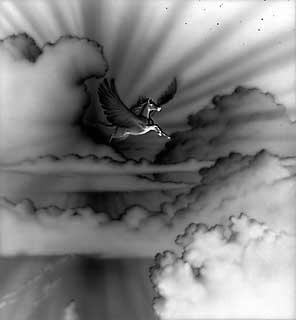
Layer. You can position your tube over the Pegasus.
9. Go to Layers and
Add A New Raster Layer. Flood Fill with white. Right Click on
your new layer . Go to Arrange and Send To Bottom. Right Click on
your top layer and Merge Visible. This is what your
image should look like:

10. Save your work. Take a break and I will meet you on the next page.
Page 2
|