|
Using A Mask In
PSP
Part 2
11. To make this
easier to place your Selection Tool, right click on the gray bar at the top of
your image. Click Rulers. Activate your Selection Tool
 . Make your settings: . Make your settings:

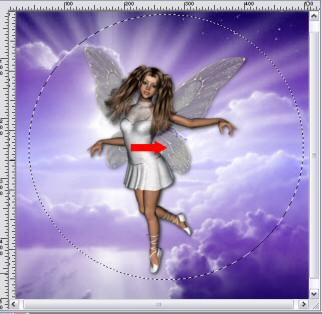
12. Place your cursor
in the middle of your image and draw an Ellipse. You can start a little
lower if you want to make it more oval. Don't worry, if you make a
mistake, go to edit and undo your selection and redo it. You will have
marching ants around your image now.
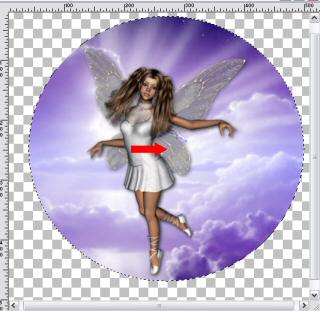
13. Go to Selections
on your Tool Bar and click Invert. Hit your Delete key once. You
should have just a circle in the middle of your image now.
14. Go to Selections
and Invert again.
15. Resize your image
75% and Sharpen. Resize layers unchecked.
16. Keep Selected.
Add a new raster layer.
17. Go to
Selections>Modify>Contract 42 pixels. Flood Fill with your gradient.
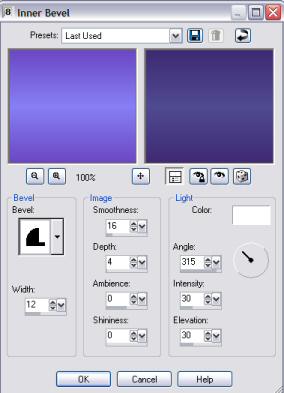
18. Contract 10.
Go to Effects>3D Effects>Inner Bevel:
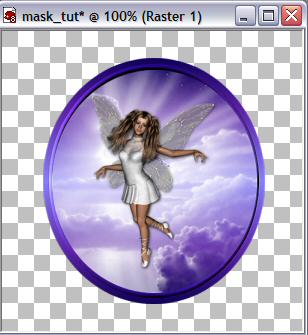
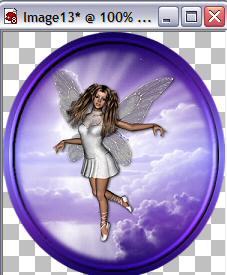
19.. Move the top
layer below the first. Select None. It should look like this.
20. Highlight your
image layer. Go to Selections>Select All>Float. Now go to
Selections>Modify>Inside/Outside Feather. Check Inside and make Feather
Amount 20.
21. Keep Selected and
Selections>Invert. Go to Edit on your tool bar and click Cut. Repeat
Cut one more time. We have a nice misted effect around the image now.
Select None. Copy and paste as a new image. This will get rid of any
excess background you have. You can now add a name, quote, or leave it
blank for a top graphic for your web page.
Hope you had fun doing this
tutorial. You have just learned how to use a mask and make a simple frame.
Plus you have learned to use multiple tools in PSP. Hope to see you again
soon.
Annie
Home
E-Mail
Other
Tutorials By Sing
|