| Welcome to my tutorial on how build web pages
using Front Page 2002. I am sure this tutorial may be
used with 2000 and 2003. All three have the features we
will be using.
Here is what we will be making. If you choose not to
make the graphics you may download the zip file at the bottom
of the page.
You may use this set you are making with me or you can
use your own. If you use your own, you will need to move
on to Setting Up In FrontPage.
What you will
need:
PSP if you are making the set. I am using PSP8 but this will
work in most versions.
Supplies Here: Music
and Roses Tube, linen tile. Of course, you can use your
own tubes and fonts.
Eye Candy- or
you may use the linen tile with this set if you do not have Eyecandy.
Simple Filters.
Get that Here.
It's free.
You will need a
version of Front Page 2000, 2002, or 2003.
You will need to
set up a Tripod account for a Server. We are using this
because it is what I use, but there are other ways to upload
to a Server with an FTP Client.
This is just a
simple way to do it for now.
Tripod Site
My Color Swatch:

Ready? Let's
begin.
At any time you
can click Preview at the bottom to see how your work will look
on the Internet. You can also view it after you save it
by going to File>Preview In Browser.
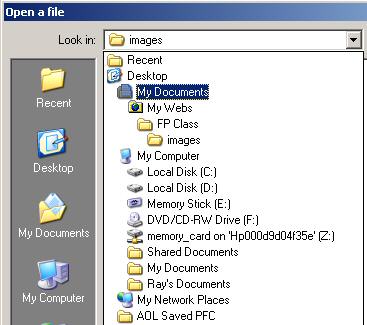
One thing that is
important is the way to set up your files and where you will
put your graphics for your page. In My Documents, make a
folder and title it My Webs. In My Webs, make a folder
and title it FP Class. In FP Class, make a folder and
titled it images (lower case). All your graphics will be
saved in your images folder. A word about naming your files:
Do not use symbols or spaces except the_. Most servers will not
recognize your files as valid. It should look something like
this:
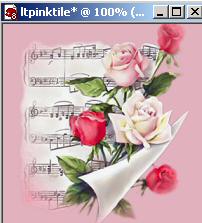
Let's
move on to our back tile. Open a new transparent image
and flood fill with E1B2BE. Open the music and roses
tube I provided. Resize it 70%. Copy and paste your
music and rose image to your 200X200 image. Merge
visible. It should look like this:
Now Go
to Effects>Reflection Effects>Kaleidoscope and use these
settings:
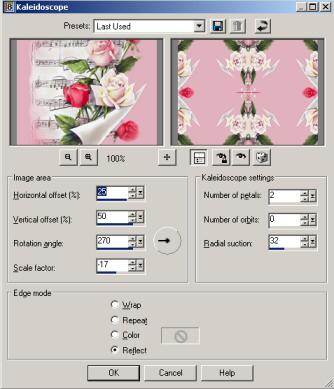
Repeat
Kaleidoscope 2 more times.
Next
go to Effects>Reflection Effects>Pattern and use these
settings:
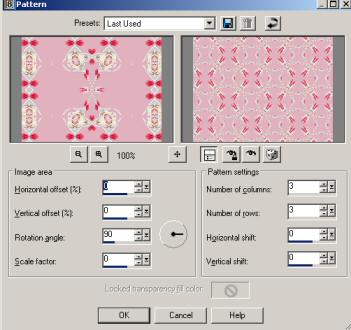
Actually, you can play with the Reflection Effect and get all
sorts of neat looking backgrounds. The important thing
is to get something that matches your set.
Next go to Simple Plugin and apply the Quick Tile. This
is what I came up with:
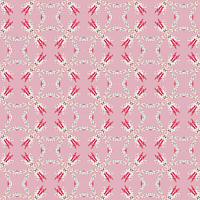
Save your background as back_tile as a jpg in your "images"
folder we made earlier. It is important that you save
all your graphics for your set in the "images" folder or they will not
show up on your page when you upload them to your server.
All images should be saved as jpg or gif depending on what
graphics you will be using. Keep in mind that animation
files are larger and they take longer to load.
Take a break, get a cup of coffee or soda and we will move onto your strip background.
Page2
These lessons were especially made for PSP & More Group2.
We are a group of PSP addicts.
If you would like to join our group
CLICK
HERE.
Page and Tutorial by
Annie
Top graphic artist is unknown.
|