Beginner's Poser Tutorial
WARNING: This tutorial contains some Nudity
|
This tutorial is written for Poser 7 but I am sure it will work in other versions. It is intended for a beginner. One of the biggest problems I had when I started was where to put all these files and then how to find them in Poser. Most of what I did prior to joining a class was torture Simon and send him to the Poser hospital. I am sure he is glad I have moved on to Vicky. Keep in mind that the Poser Program is a real resource hog. It is easy to run out of memory so a memory management program is a good thing to have running. MaxMem is the one I use and it is free. I exit any thing I have running that I don't need, even my Internet connection. It is important for you to save your work often in the event Poser shuts down on you unexpectedly. This has happened to me while I was rendering and I was very happy I had saved my work. So save at least every couple of steps. During the revision of this tutorial, I used a different character, hair, & pose so yours will look different in the screen shot. I am trying to include more freebies for your first time. The character I used the first time is no longer available. At the time of this revision, all items were available. Most of these supplies are suggestions. You have to have Victoria 4.2 & the Morphs. The rest you can use applications of your choice.
If you don't want to pay for supplies, you can go to some places such as Renderosity, Daz, RDNA, etc. They have freebie sections. Another great place for freebies is Pixeluna She has some great poses and other items. She also has a store at Renderosity. You might try RDNA for freebie lights. If you join Daz's Platinum Club (highly recommended), you will save, save, save. Lots of $1.99 items.
ps_pe069_Victoria4.2 (Free at Daz) Diva Hair V4 by 3Dream (Daz) Meryl 4.2 by Syltermermaid (Free) Basic Poses by Pretty 3D (Renderosity) V4 Morphing Fantasy Dress (Daz) V4 Free Pearls & Fans By Richabri (used with Classic Elegance Hair Below)
Lights of your choice or use the ones that come with Poser
Every application comes with a Read Me file. I suggest you always read them since they could contain special instructions on how to use the application. It will also include where each and every thing is in you library.
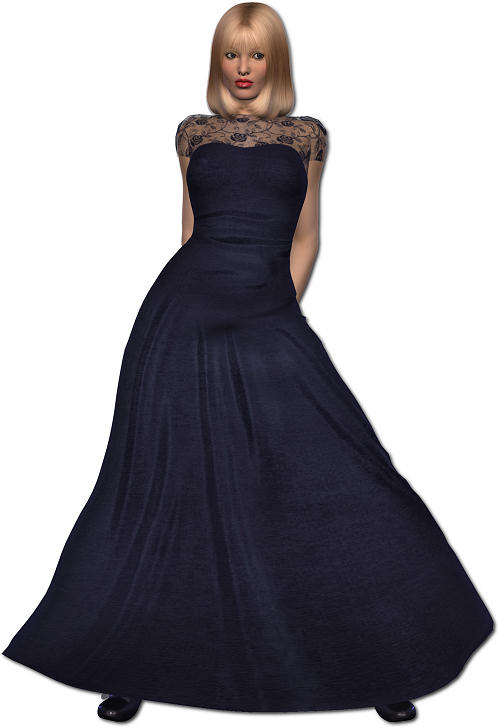
There is a free hair named Classic Elegance by Mint that is very nice. Below is an example of how it looks. If you load it, you will find it in your Library under Hair (M3D) and Pose for the textures (MAT_Classic_Elegance).
Click on Image for Larger View
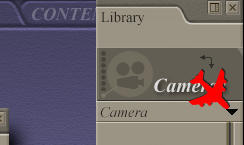
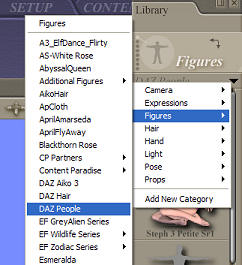
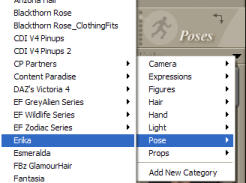
You want to go to Figures>Daz People and choose Victoria 4.2 Double Click Victoria 4.2 to load on your canvas.
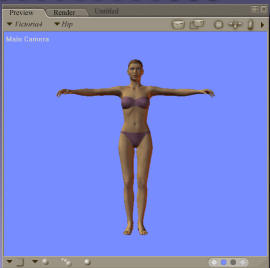
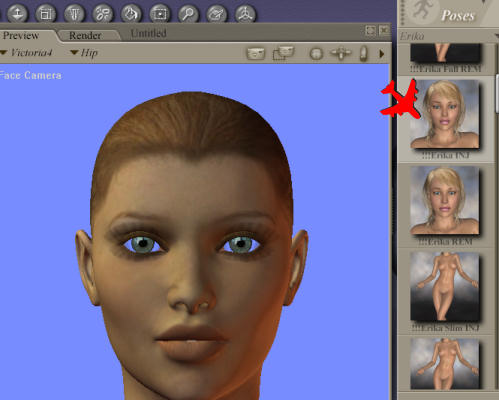
3. You should have this. Don't worry if yours is nude. Mine isn't but she soon will be.
Image 3
4. Now we are going apply the character Meryl to the V4 figure. We will also be adding makeup, eye color, etc. Back to your libraries, click the arrow, choose Pose and then find Meryl. If you installed it correctly it will be there. At this point, you may want to zoom in on her face. Go to Display>Camera View>Face Camera. Go back to your libraries, click the drop down arrow, click Pose, and then find and click Meryl.
Image 4
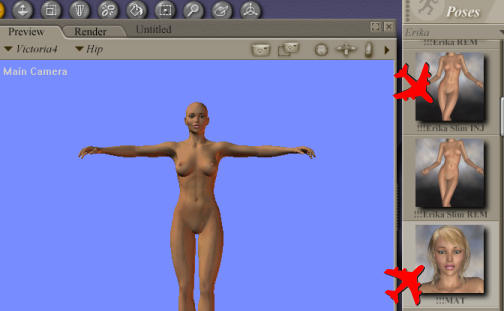
5. Double Click !!!Mat You have to double click on all of them from here on. Now she should be naked. Brrrrrrr! We will put some clothes on her in a bit.
Image 5
6. Go Back to Display>Camera View>Main Camera to zoom back out. Find !!!Meryl Full and double click. Find and double click on !!!Meryl INJ. We will apply first the makeup though since we are here already. Save your work! You don't want to hear me say, "I told you so!" if you lose your work and have to start over. Just go to Save as .Pz3.
Image 6
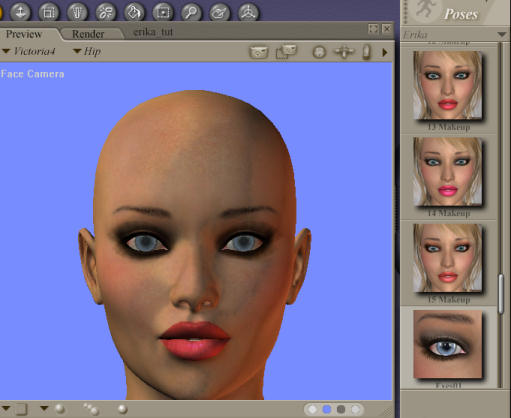
7. Now below all this are some really pretty make up jobs and pretty eye colors. so just scroll down. Choose one you like and double click. Same for the eyes. Ladies, don't you wish it were this easy? LOL You may want to zoom in on her face again to see a close up. I am choosing a reddish color. I chose blues. But you choose what you like.
Image 7
SAVE YOUR WORK!
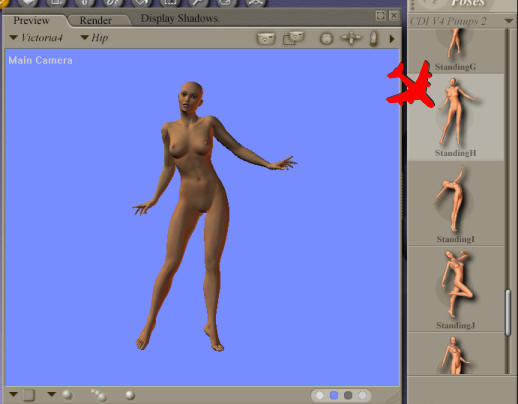
8. Let's pose her. Go to your library. Click Pose>!PrettyBaseIV. I chose Standing)! But you can choose one you like. Be aware you may have to adjust her dress or her limbs later. Of course, if you are using a different choice of poses, yours will be different.
9. Now Victoria has become Meryl. Poor girl doesn't have any clothes on and she is cold so let's dress her. We are going to use morphing clothes. Think of it as a skeleton and we will be adding layers to her body. The first layer is the base, the second will add different styles and color. Later, you will learn how to use textures and different materials. Now go to Figures>V4 Morphing Clothes. Double click the Fantasy Dress.
Image 9
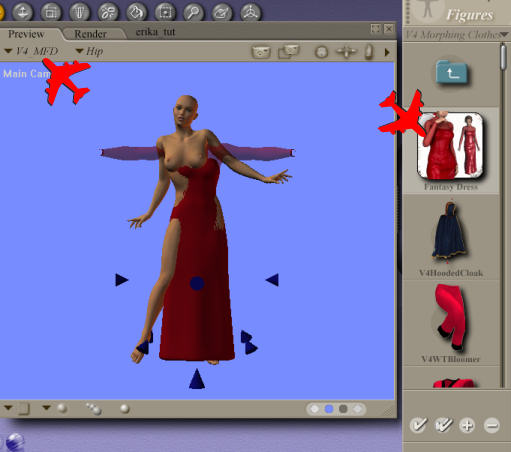
10. OOPS! Well, poor Meryl's clothes missed the target and she is still out in the cold. Just make sure in preview it is on V4 MFD. Then go to Figure>Conform To. You want to conform it to Victoria 4.
Image 10
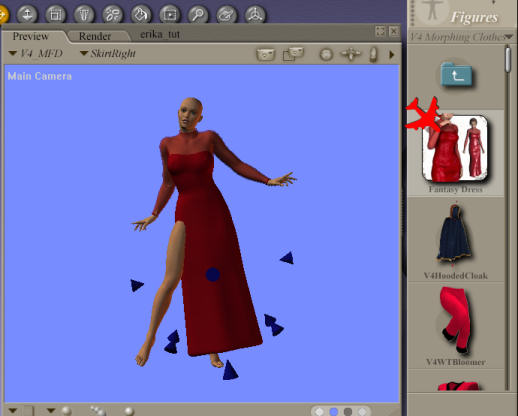
11. Ok, so now her leg is sticking out. In this case it doesn't look so bad and we could leave it like that. But I want to experiment and move her dress. Those little nodes are what we will be using. Keep this picture in your head. I am going to move on to another page since this one is pretty full of images. So take a break, get something to drink, and I will meet you on page two.
I hate to be a nag but... SAVE YOUR WORK!
Tutorial By Annie Of Yummie Designs Revised July 20, 2010
|