Animated Alphabet Name Tag
Supplies Needed:
PSP
Animation Shop
A Font Of your choice
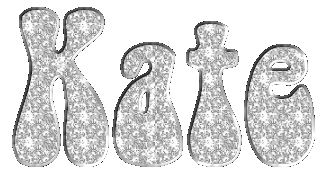
I used Bell Bottom Laser for
Kate's name tag.
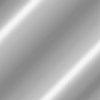
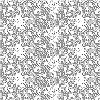
Patterns of your choice. I used a
silver and a diamond pattern.
You can right click and save them
here. I got these from Joycee.
Visman Sparkle Filter. You can download it HERE.
For more Visman Filters Go HERE.
Known as VM Sparkle
1. Open PSP
2. Open your font and minimize it.
3. Open a new transparent 400X400.
This is big but we can resize later.
Open your patterns in PSP. Make your
foreground your silver pattern and your
background the diamond pattern.
4. Use your text tool with these setting:
![]()
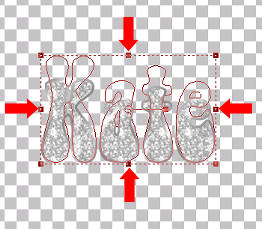
5. You can stretch out your name using the nodes where
the red areas are.
6. Right click on your Vector Layer and
Convert to Raster Layer.
7. Select your name. Selections>Select All>
Selections>Float>Selections>Defloat>Selections>
Modify>Contract 3>Selections>Invert.
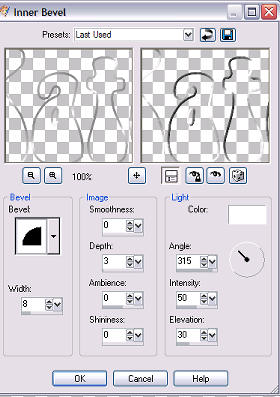
8. Go to Effects>3D Effects>Inner Bevel.
Apply the following settings:
9. Selection>Invert. Leave Selected.
10. Duplicate your name two more times in your
layer palette. You should have a total of 3 layers of
your name. You can delete the background layer.
You won't need it.
11. Highlight the first layer of your name.
Apply VM Sparkle Filter using these settings:
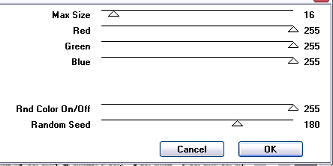
12. Highlight your second layer. Leave settings the same
except change your Max Size to 18 and Random Seed to
170.
13. Highlight your third layer. Change Max Size to 20
and Random Seed to 182.
Note: You can play with the settings in VM Sparkle until
you get the look you want.
14. Crop your image.
15. Save as a pspimage and animate in AS.
I left the Frame Properties at 10.
This tutorial is written by Annie (Singanpray).
Any similarities to other tutorials is purely coincidental.